
Hi friends! Today I am sharing a really quick and easy craft project that I did over the weekend. And if I can do it, you can do it (trust me!) Aren't these little wooden dolls the sweetest? Ella has a wooden dollhouse that she plays with every single day; it is one of her favorite toys. The house only came with 2 little people and I know she would love more family members for it. I was going to buy some little figures online, but realized it would be fun to try and make little dolls myself.

I ordered materials from Michaels, as there was a 20% off coupon and they are offering curbside pick-up at this time! *Win* I also wanted to get a little wooden box to put the dolls in, so I got that as well. Here are all the materials that I ordered (I got everything for under 15$ and we have plenty of paint left for future projects.)


-Wooden peg people, both large and medium size
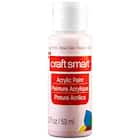
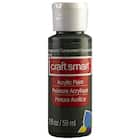
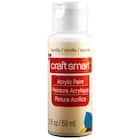
-Acrylic paint, I chose dark green, light pink and vanilla
-Foam paint brushes
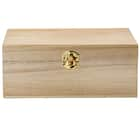
-A wooden box
Here's how we made them (so easy!)
1. Set up your station! I like to use a leftover egg carton as a place for my paint, but The Dollar Tree and most craft stores will have cheap paint palettes too! The brushes I bought weren't the best, but it was all the craft store had left, so I made it work. I used q-tips for the small crevices like around their necks.
2. Holding onto the head of the doll, paint in vertical strokes all around the body. The paint dries fast, so I did 3 coats. You could do more for a cleaner look, but Ella was anxious to get her hands on them, so I did it really quickly!
3. Once the body is dry, use a sharpie pen to draw on a little face!
So easy! :) You could actually get really detailed with these little dolls- adding accessories and drawing on clothes. I wanted to keep the dolls simple, as I love that look. But this craft is super versatile.
-Foam paint brushes
-A wooden box
Here's how we made them (so easy!)
1. Set up your station! I like to use a leftover egg carton as a place for my paint, but The Dollar Tree and most craft stores will have cheap paint palettes too! The brushes I bought weren't the best, but it was all the craft store had left, so I made it work. I used q-tips for the small crevices like around their necks.
2. Holding onto the head of the doll, paint in vertical strokes all around the body. The paint dries fast, so I did 3 coats. You could do more for a cleaner look, but Ella was anxious to get her hands on them, so I did it really quickly!
3. Once the body is dry, use a sharpie pen to draw on a little face!
So easy! :) You could actually get really detailed with these little dolls- adding accessories and drawing on clothes. I wanted to keep the dolls simple, as I love that look. But this craft is super versatile.

I chose pink for the ladies, and green for the gents. The little box just got a few coats of vanilla paint. I know Ella will want to decorate it at some point, so it's only a matter of time before it's covered in stickers. Ella had to wait for the dolls to completely dry while she napped, but when she woke back up she immediately started playing with them in her dollhouse *affiliate link*


I am so glad she is enjoying them. I can't wait to do more craft projects with Ella as she grows and is able to participate more! There's something really special about making something together and then watching her play with it after. Let me know if you decide to make these homemade dolls, I would LOVE to see them! If you aren't the crafty type, my friend Jennie sells similar wooden dolls in her Etsy shop. (She also has a TON of cute other products!) Check out here shop here.
Thank you so much for checking out our post today friends. I hope to have more crafty projects coming your way soon.


Love easy little crafts like this!
ReplyDelete